Hot Yam Son of a Gun you did it (a censored version of the phone text I sent my sister)!! My sister, Peaches, is a full fledged Kindergarten teacher!! Waaaahooooheeehaaaaaawww! I'm doing circles for you Peaches! I have to admit very proudly that Peaches is one of the most amazing individuals I have ever met and I'm blessed to call her kin. She starts her new adventure in life as a kindergarten teacher on Monday!!
Many years ago when I was studying education, I 'observed' a kindergarten classroom. I was planning on teaching K-3rd grade. However, after a few weeks of 'observing', I shook the kindergarten teacher's hand and declared her a saint and informed her I could not, would not be a teacher. I changed my major and never looked back.
Peaches on the other hand is made of all that good, patient, loving, calming stuff that kindergarten teachers are made of. I truly hope that she starts a blog and I know that she'll keep us all laughing with her Kindergarteners' antics. One of the items that I made for her new classroom was some lanyards. My Little Ladybug was in Kindergarten last year and she was always wearing a lanyard. Her teacher used them for field trips, going to the media center, special events, and more. Well, Peaches' fellow teachers really liked her lanyards, so I'm working on some for them too. Then I thought, there are lots of teachers out there and these lanyards are super easy and quick to make, why not do a tutorial....so here we go. :)
First cut a strip 2.5" x 36" You can make the strip longer or shorter depending on your need and preference. Fold and press one short end about 1/4". Fold and press lengthwise toward center so that raw edges touch half way in the middle. Do not let them over lap.
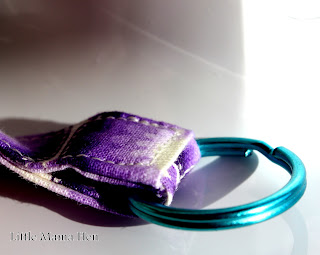
Fold and press in half again along the length of the strip. Place a key ring onto the strip. Open up the strip at the short ends and tuck the raw edge end into the folded end. Make sure that your strip is not twisted. Fold back together.
Sew along the edge of the folded short-end piece. I always pull up my bobbin thread on top so that it will not get tangled. Make sure you back stitch.
Without cutting the thread, turn and begin sewing down the length of the strip. Sew close to the edge but make sure that it is catching the bottom edge too.

Sew several times between the two parallel stitches. This step helps keep the key ring in place.
You can add a clip to the key ring. I like using a key ring because it makes it very easy to change the clips when needed. I hope that you enjoy and remember, the only real thing that you can change in this world is your perspective. It's amazing of the wonderful things that happen in life when we begin to see life with a hopeful and positive perspective. Love life, one moment at a time! -Little Mama Hen.
 Linking up to
Crafty Vegas Mom
Confessions of a Fabric Addict
Freemotion by the River
Quilt Story


I'm so glad you posted this tutorial! I want to make this! By the way, my daughter is 2 semesters away from being an English high school teacher. Got to admire them!!
ReplyDeleteVery nice tutorial. These are so popular, seems everyone has one.
ReplyDeleteThanks for the tutorial! I know many teachers!
ReplyDeleteWow! Outstanding!
ReplyDeleteWhat a great tutorial! My granddaughter just started kindergarten and this would be wonderful! Thanks for sharing.
ReplyDeleteFreemotion at the River Linky Party Tuesday
Great tutorial, just love it. Thanks for sharing!!
ReplyDeleteBy the help of this I came to know about usefulness of Printed Lanyard.
ReplyDeleteLanyard